The open neck nozzle with its. Cut the bottom off any size bottle.
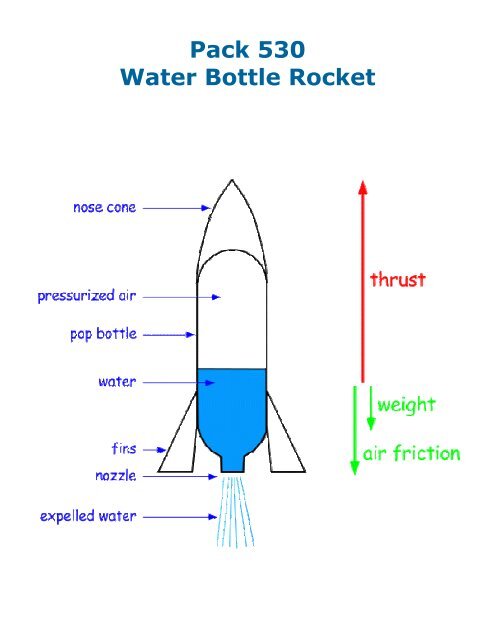
Pack 530 Water Bottle Rocket
The rocket will go off when the cork can no longer withstand the pressure building up in the bottle.
. This will make the fin stiffer and stronger. To prevent damage or injury caused by a falling rocket you can use rubber bumpers crumple zones and utilize safe launch practices. Bottles should be retired from use after 10-15 launches.
Stiff fins are the best fins. Apply the glue to the fin material and then attach the fin to the body of the rocket. Failing to do so can result in the rocket leaking or exploding under pressure due to contaminated splices.
The bottle should be made to stand inverted on its fins. Use this list of tips to learn how. Carefully align top portion of bottle on the 2L bottle to be used for the pressure vessel.
If you are going to do more than a few launches get a good pump foot-powered or floor pump with a pressure gauge. Cut the bottom off of a 2L Bottle discard bottom. Carefully align top portion of bottle on the 2L bottle to be used for the pressure vessel.
Water Rocket Tips Menu. Fill the bottle with cold water. These however may also experience malfunctions.
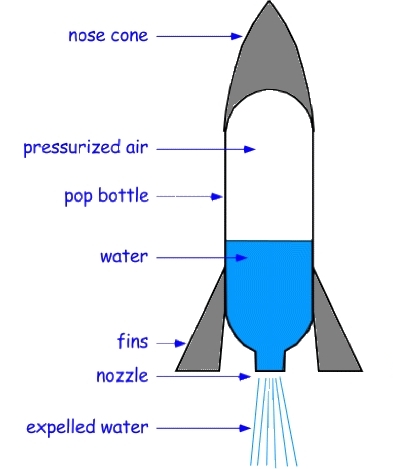
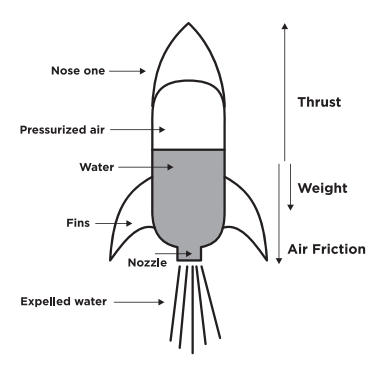
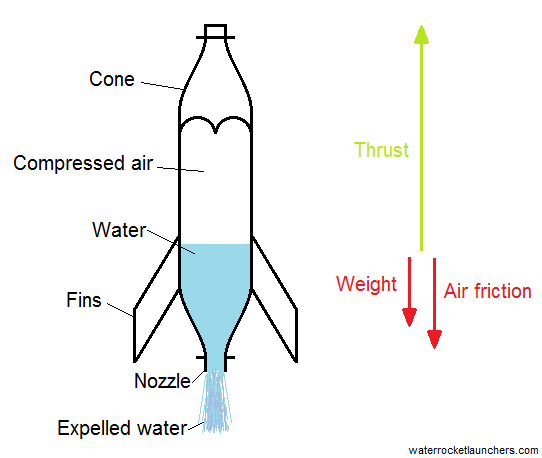
The COD is the point at which a pivot is placed on a wind vane in order to prevent it. Holding a pen in one hand and rotating the rocket resting in a groove in the other I scribe a mark around the body of the rocket. With most water rocketry the real job is to lift a pop bottle which weighs only 50 grams into the air as high as possible.
Tapesecure the joint between the nose cone stage and the pressure vessel. Only plastic drink bottles should be used and new bottles should be used whenever possible. This involves removing the labels and adhesive from the bottles and making sure there are no oils on the bottle.
Tapesecure the joint between the nose cone stage and the pressure vessel. Removing excess weight is one of the simplist ways to make your water rocket fly higher. Tips A few tips.
If you want a less permanent solution and perhaps an easier way to. Children should be closely supervised when they are using rockets. Holding a pen in one hand and rotating the rocket resting in a groove in the other I scribe a mark around the body of the rocket.
Using the hot glue gun apply a bead of glue to all of the seams that you can reasonably reach. I use a rope on the ground to keep them from gradually inching forward. Rotate and observe your water rocket from several.
Water bottle rockets also use launch tubes. Do not overestimate your own capabilities. Most water rockets are made using the open neck of the pop bottle as the exhaust nozzle.
Although this is convenient the large nozzle is grossly mismatched to the job requirements. This tutorial will show you another method how to prepare your bottles for Water Rocket Constrction. With fine sandpaper lightly rough.
Fill the bottle with cold water. Only launch with adult supervision in a wide open field far away from trees buildings roads people and. For launching take the bottle outdoors and connect the pump to the needle adaptor.
To launch the rocket. With fine sandpaper lightly rough up the area to be glued. Make the bottle a quarter full with water and insert the cork in tightly to close it.
Flexibility decreases the effectiveness of a fin. The water will shoot out everywhere when the bottle rocket takes off so be prepared to get a bit wet. Cut the bottom off of a 2L Bottle discard bottom.
Tips for building a good Water Rocket. Keep kids 20 feet away while launching. Hold the rocket by the neck of the bottle and pump air into it.
How Can You Use Your Water Rocket Safely. Even if they understand and agree to the safety rules there will be. Water Rocket Tips 1.
Let go of the bottle. Step two cut two disks the same width as the bottle out of corregated plastic step three cut a strip out of plastic the same width as the bottle but a little bit smaller in length than the bottle Step four. To trace the bottles shape on the fin material place the bottle directly under a light source.
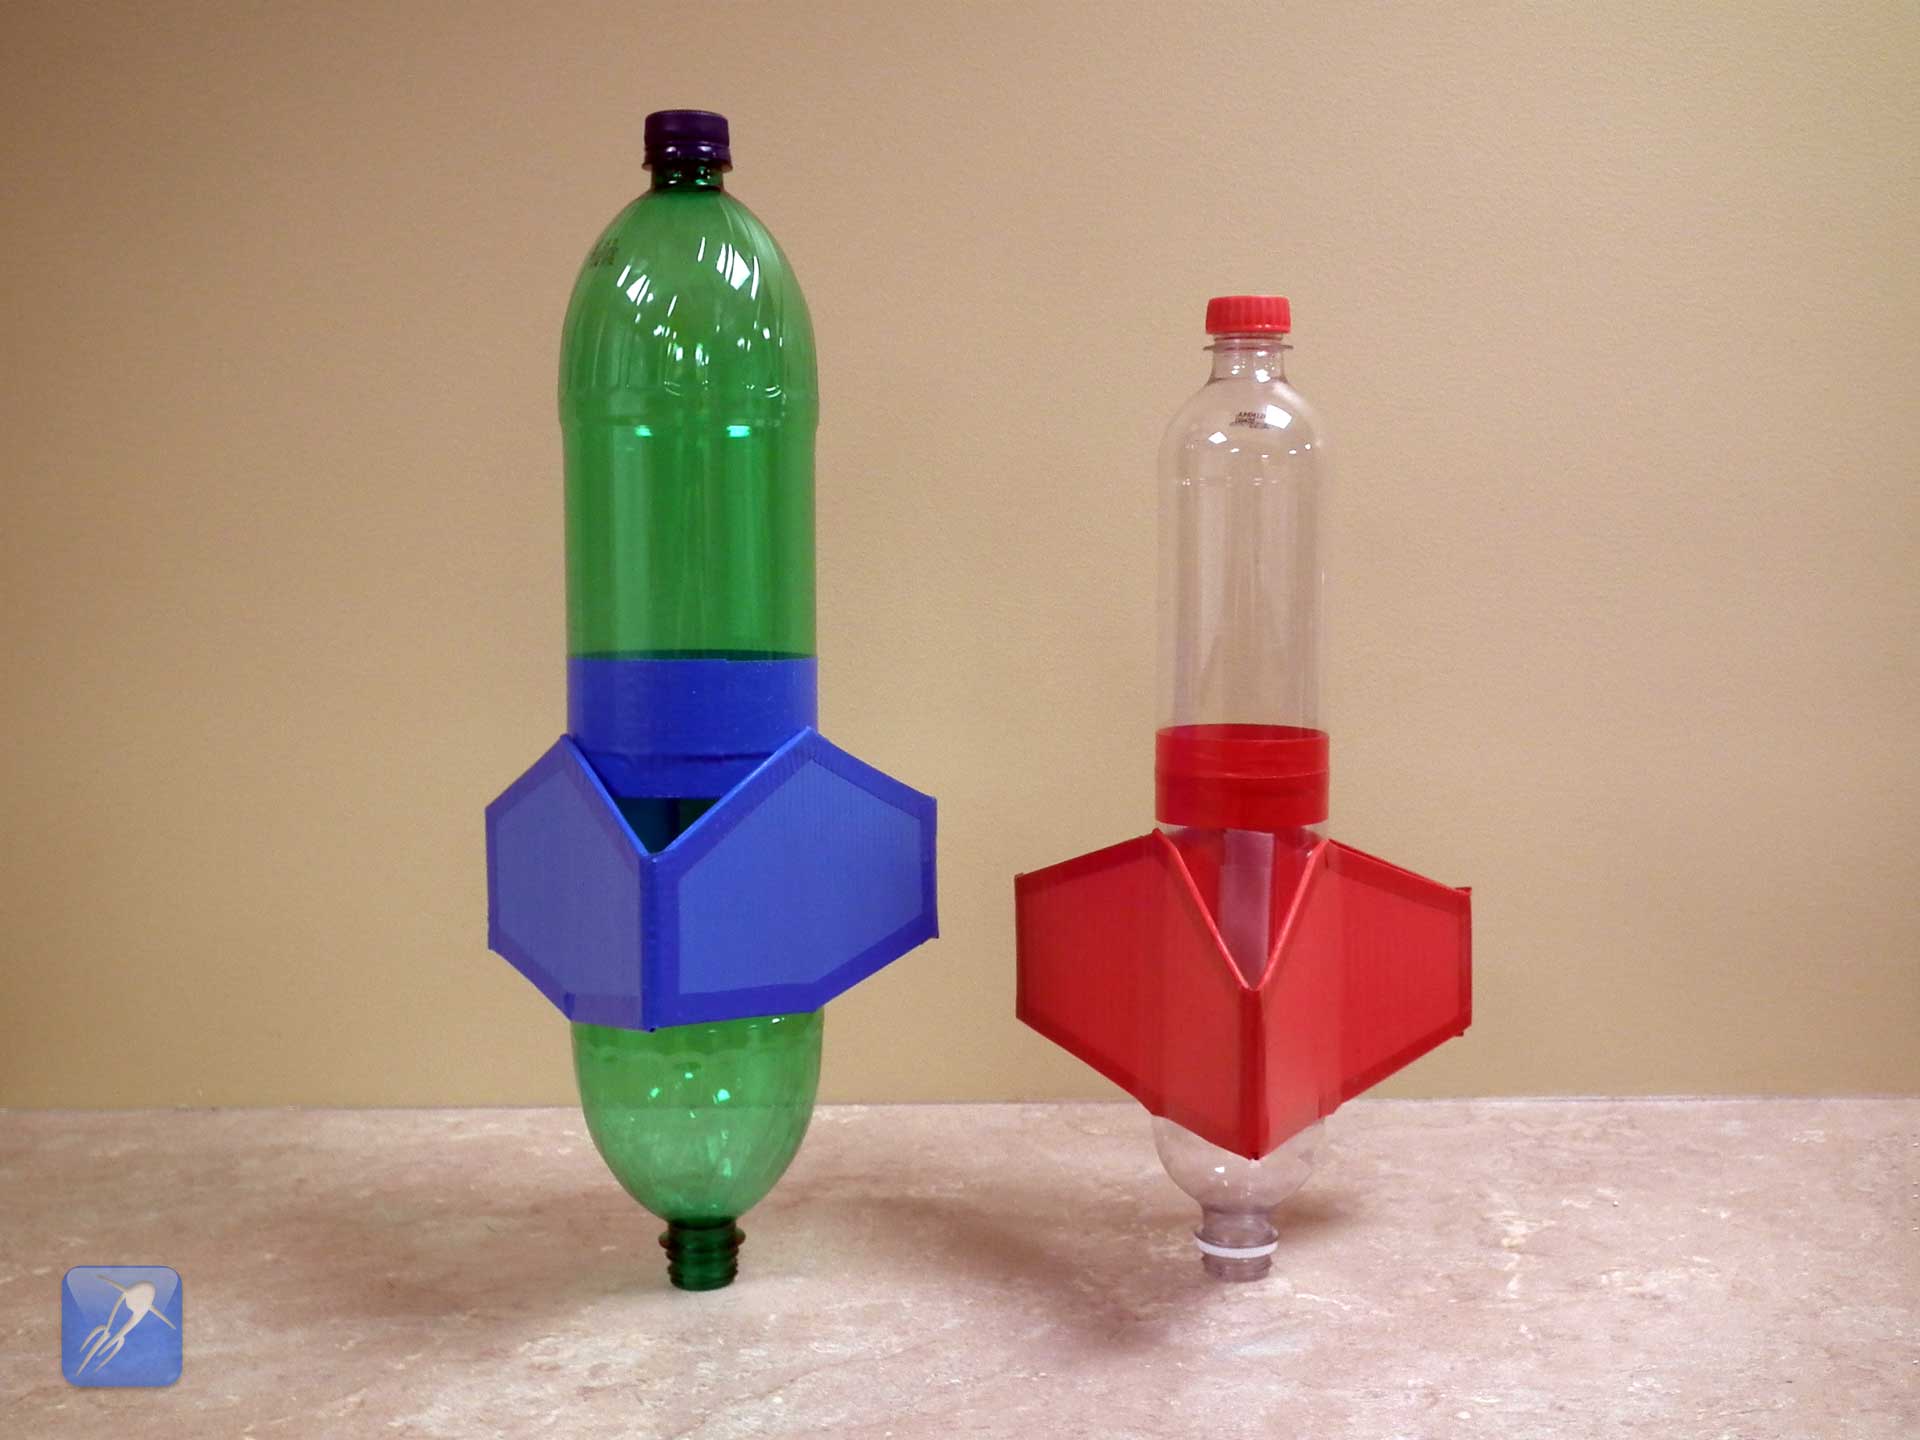
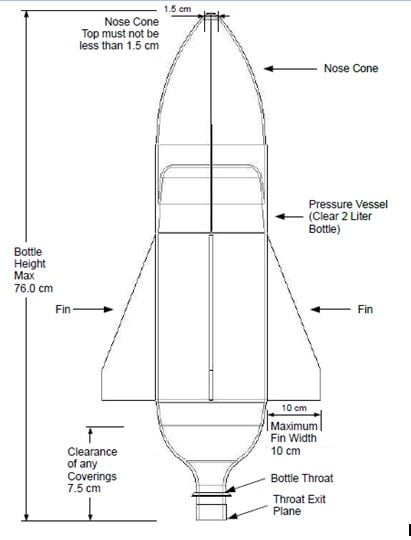
The size of your rocket depends on the number of joints between the plastic bottle sections. Fill the pressure chamber bottom bottle about 13 full. Rockets are safe when everyone understands and abides by safe behavior.
Rotate and observe your water rocket from several. Glue them together and when dry put your payload into the payload section of the rocket. Want to make your water rocket fly higher go further or stay in the air longer.
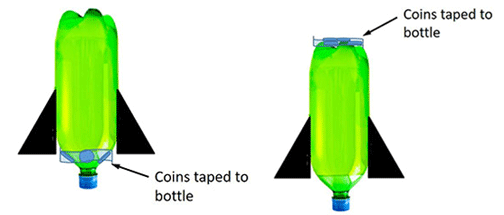
Start small and than slowly increase the level of difficulty. Increase Altitude Go Higher Weight Reduction A lighter rocket will fly higher. One can also attach a parachute to their water bottle rockets to help prevent landing problems.
The key to water bottle rocket flight stability is the physical separation along the length of the rocket of the center of drag COD and the center of mass COM. Never put anything in your water rocket but air water and sometimes non-toxic handwash-type dish soap. Assemble them around the bottle which is about to become a permanent part of this rocket.
I pump to 80 psi. Place the grain of the fin perpendicular to the bottle. Water Rocket Assembly Method Step 1.
Water Rocket Assembly Method Step 1.
U S Water Rockets Water Rocket Designs Construction And Experiments
How To Make A Water Bottle Rocket Science Project Ideas
Water Bottle Rockets Activity Teachengineering
Pop Bottle Rocket Part Iii Force And Mass Science World
How To Make A Water Bottle Rocket Science Project Ideas
2
Design Rocket Variables Water Bottle Rockets
2
0 comments
Post a Comment